
Blog
Sharpening a Curved Blade: Seax, Kukri, Scimitar and Katana

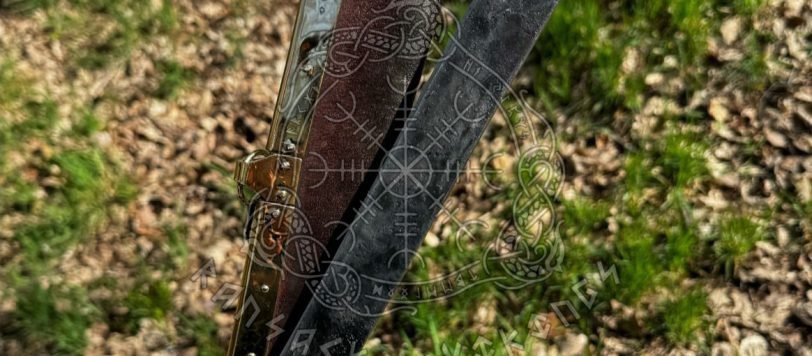
Sharpen a curved blade by holding the angle constant while the edge changes direction under the stone. Work in short sections, sweep from heel to tip, and lift the handle as you reach the belly so the point stays in contact. A narrow stone or a rod steers better than a wide bench stone. The angle is what matters. The curve is only a steering problem, and most people lose to it by sharpening a kukri as though it were a bread knife.
A straight edge lets you set an angle once and hold it for the whole stroke. A curved edge does not, so the hand has to move in two ways at once. Understand that and a kukri is no harder than a paring knife.
Why curves are harder
On a straight blade, the edge, the spine and the stone all stay in the same relationship for the length of the stroke. On a curve, the moment you pass the flat section the edge starts turning away from the stone. If your hand does nothing, the contact point slides toward the spine, the angle opens up, and you end up with a dull, rounded belly and a sharp middle. That is the classic result of sharpening a curved blade as though it were straight, and it is why so many kukris and scimitars come to us blunt at both ends.
There are two ways to fix it: move the blade so the contact point stays constant, which means sweeping and rolling as you go, or use a sharpener narrow enough to steer around the curve instead. Most people use a mix of both.
What you need
- A coarse stone around 400 to 600 grit for repairing or reprofiling, a medium stone around 1000 for sharpening, and a fine stone around 3000 to 6000 for finishing. Most work happens on the medium.
- A leather strop with a little polishing compound.
- A marker pen. The cheapest thing here and the most useful.
- For deep curves and recurves, a round or half round ceramic rod, or a small handheld stone you can move rather than a bench stone the blade has to move over.
- A vice with soft jaws, which is a real help on long blades.
The universal method
1. Mark the bevel
Colour the existing bevel along its whole length with a permanent marker. After a few strokes on the stone, the ink tells you where you are making contact. Ink gone at the very edge means the angle is correct. Ink gone at the shoulder but still present at the edge means the angle is too low, and the reverse means too high. Do this on any unfamiliar blade and you never have to guess.
2. Find and hold the angle
Lay the blade flat on the stone and lift the spine until the bevel sits flush. That is the factory angle and, for most working blades, it is the one to keep. Around fifteen to twenty degrees per side suits most kitchen and utility blades, and chopping blades like a kukri usually want a wider, tougher angle than a slicing blade. Do not change a blade’s geometry unless you have a reason.
3. Sweep and roll
Start with the heel of the edge on the stone at the near end. Push the blade forward and, at the same time, draw it sideways so the contact point travels from heel toward tip. As you reach the belly, lift the handle gradually so the rising curve of the edge stays flat against the stone. By the end of the stroke the point should be in contact and the handle noticeably higher than it started. That combined push, draw and lift is the whole skill. It takes an evening to learn and longer to trust.
4. Work in sections if the curve is deep
On a strongly curved blade, break the edge into three sections: the straight part near the handle, the belly, and the last inch or two toward the point. Sharpen each in turn at its own angle, then blend them with a few full length sweeping passes. That is easier than holding one continuous motion across a big curve, and it gives a more even result.
5. Raise a burr, then remove it
Keep working one side until you can feel a fine wire of metal along the opposite side of the edge, from heel to tip. Check it with a thumb drawn away from the edge, never along it. Then do the same on the other side. When both sides have raised a burr, take lighter and lighter alternating passes to remove it, move to the fine stone, and finish on the strop with edge trailing strokes.
Blade by blade
The seax
Most seax blades are not really curved at all. The classic broken back profile has a straight edge and a spine that drops in an angled line to the point, so the edge itself is easy. The difficulty is the last inch, where the edge and the falling spine converge at a sharp angle. Take that section last, use short controlled strokes with the tip at the near edge of the stone, and be careful not to round it over. Some seaxes do have a curved belly toward the point, in which case use the roll described above for the final third. A guide to the shapes is in our Viking seax knife guide.
The kukri
This is the hardest of the four, because the curve is deep and the edge angle changes deliberately along the length. Traditional kukri edges are not uniform: the section near the handle is often ground finer for carving, the belly is the chopping zone and is left thicker and more obtuse, and the tip is finer again for point work. Sharpen each zone at the angle it already has, which is where the marker pen earns its place. Work the belly with a handheld stone or rod moving over the blade, since a bench stone is awkward against such a strong curve. Never sharpen into the notch at the base, which is not a cutting feature. Our piece on what a kukri is explains the shape.
The scimitar and other long curved swords
The problem here is length rather than curvature. A long blade cannot be swept over a bench stone, so reverse the relationship: clamp or brace the blade with soft jaws and move a handheld stone along the edge, in overlapping sections of a few inches, keeping the stone flat to the bevel. Long blades often have a distal taper, meaning the steel thins toward the point, so check the angle in each section rather than assuming it is constant. Talwars and sabres take the same approach, and the background is in what is a scimitar.
The katana
Be honest with yourself about what you are doing here. Traditional Japanese polishing is a separate craft carried out by a trained togishi over many stages of natural stone, and it shapes the geometry and reveals the hardening line as much as it sharpens. That is not a home job, and an antique or a serious collector piece should never be touched with a modern stone.
For a modern production katana that you intend to use, a straightforward touch up is reasonable. Brace the blade, work with a handheld stone in short overlapping sections from the base toward the point, follow the existing bevel exactly, and keep the stone flat to the surface. Curvature on a katana is gentle and even, so the roll is slight. Do not attempt to change the geometry, do not work the hardened line area aggressively, and stop as soon as the edge is keen. Our guide to what a katana is covers the construction that makes these blades different.
Recurved edges
Some blades curve inward before curving out, leaving a section a flat stone physically cannot reach: it touches only the two high points. Use a round or half round ceramic rod, or a small stone with a rounded edge, worked in that hollow alone at the same angle as the rest of the edge. Do that section first, then blend the rest to match.
What ruins a curved blade
Powered wheels and belt grinders are the fastest way to destroy a good blade, and they do it invisibly. Heat drawn into a thin edge softens the temper, and once the hardness has gone the edge will not hold no matter how sharp you get it. There is no way to see it happening and no way to reverse it short of a full reheat treatment. If a blade turns even slightly blue at the edge, that section is spent and no stone brings it back. Sharpen curved blades by hand.
Two other habits do real damage. The first is rounding the tip by dropping the handle at the end of a stroke instead of lifting it, which shortens the point a little every time until the profile is wrong. The second is changing the angle without meaning to, usually by sharpening a chopping blade at a fine kitchen angle. A thin edge on a kukri chips out the first time it meets a knot, a lesson that needs teaching once. Match the angle the maker put on it.
Testing the edge
Run a fingernail lightly across the edge at right angles, never along it. A sharp edge catches and bites; a dull one slides. Check at three or four points from heel to tip, because curved blades go blunt unevenly. A properly sharpened curved edge should slice clean through a hanging sheet of paper at every point along its length, including the belly.
Afterwards
Wipe the blade clean of slurry and metal dust, dry it fully, and put a light film of oil on it. Sharpening exposes fresh steel, which is the most rust prone it will ever be. Our knife care guide covers what to use and how often.
What we carry
Our Viking seax range covers broken back and straight edged forms in 1095 with olive wood, camel bone and rosewood handles, most with a leather sheath. Long curved blades sit in scimitars, which also takes in talwars and Arabian forms, and Japanese profiles are in katana and Japanese swords. Curved working blades run through the hunting knives range, where skinning profiles have the deepest bellies of anything we sell. Plain blades are 1095 hardened to 54 to 58 HRC and Damascus blades are 1095 and 15N20 forge welded at 58 to 60 HRC, so a hand stone will always work on them. Every piece is handmade in the Czech Republic the old way, then imported, inspected and shipped from Memphis, Tennessee, with engraving done in the US after arrival.
Two blades bring most people to this page, the kukri and the karambit. For straight edges, the stone method is in whetstone sharpening.
Questions people ask
Why does my curved knife go blunt at the tip first?
Because the angle opens up as the edge curves away from the stone. If your hand holds one fixed position through the stroke, the belly and the tip receive less and less contact while the middle of the blade gets sharpened properly. Lifting the handle as you sweep toward the point keeps the rising curve flat against the stone, which fixes the problem and costs nothing but attention.
Can I sharpen a kukri on a normal bench stone?
You can do the straighter section near the handle that way, but the deep belly is much easier with a handheld stone or a ceramic rod that you move along the blade. Sharpen the kukri in zones, since the edge angle deliberately changes along its length, and match the angle already on each section rather than imposing one angle over the whole edge.
Should I sharpen a katana myself?
Not an antique or a serious collector piece. Traditional Japanese polishing is a specialised craft with its own stones and stages, and modern abrasives will damage both the geometry and the value. A modern production katana intended for use can be touched up by hand with a stone worked in short sections along the existing bevel, but stop as soon as it is keen.
Is it safe to use a belt grinder or a powered wheel?
No. Not on a finished blade, whatever the grinder cost. Powered abrasives draw heat into the thin edge fast enough to soften the temper, and once the hardness is gone the edge will never hold again. The damage is invisible unless the steel discolours, and it cannot be reversed without a full reheat treatment. Every curved blade in this article should be sharpened by hand.
What angle should I use?
The one already on the blade. Colour the bevel with a marker pen, take a few strokes, and see where the ink comes off: at the very edge means your angle is right. As a rough guide, slicing blades sit finer and chopping blades like a kukri want a wider, tougher angle. Putting a thin kitchen edge on a chopper will chip it.
How do I sharpen a recurved section?
A flat stone cannot reach into a hollow, so it will only ever touch the high points either side. Use a round or half round ceramic rod, or a small stone with a rounded edge, and work that section on its own at the same angle as the rest of the edge. Do the hollow first, then blend the surrounding edge to match it.
Shop the range
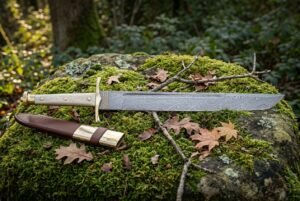 Bonewarden Hand Forged Damascus Viking Seax | 24 Inch Overall with 18 Inch Blade | Norse Collector Gift | RK-1281
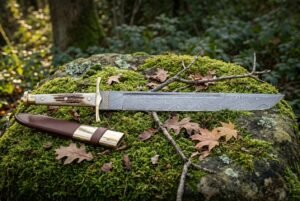 Stagwarden Hand Forged Damascus Viking Seax | 24.5 Inch Overall with 18 Inch Blade | Norse Collector Gift | RK-1282
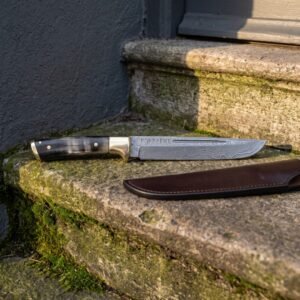 Hornsax Hand Forged Damascus Steel Broken Back Seax | 12 Inch Overall Length | Horn Handle with Rune Etched Blade and Brass Fittings | Norse Belt Knife Gift | RK-2157
 Sandspire Hand Forged High Carbon Steel Arabian Sword | 35 Inch Overall with 29 Inch Blade | Collector Display Gift | RK-1387
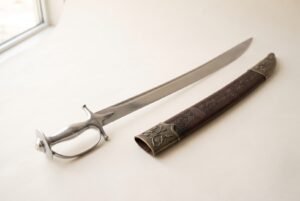 Ironlotus Hand Forged High Carbon Steel Talwar | 34 Inch Overall with 28 Inch Blade | Collector Display Gift | RK-1390
 Brassbloom Hand Forged High Carbon Steel Talwar | 38 Inch Overall with 32 Inch Blade | Collector Display Gift | RK-1392