
Blog
How to Sharpen a Knife with a Whetstone

To sharpen a knife with a whetstone: soak or lubricate the stone, hold the blade at a steady 15 to 20 degree angle, and sweep the edge from heel to tip until a burr forms along its full length. Flip it, repeat, move to a finer grit, finish on a strop. That is the whole method. It takes a minute to explain and a few sessions to stop doing badly, and the rest of this guide is about the gap between those two: which grits to buy, how to hold the angle steady, how to know when each stage is done, and the handful of mistakes that keep beginners stuck with dull knives.
Choosing Your Whetstone Grits
Whetstones are graded by grit: lower numbers cut faster and leave a rougher edge, higher numbers polish. You do not need a drawer full of stones. A two-sided 1000/6000 stone covers almost every kitchen and field knife, and the drawer full of stones is usually a hobby rather than a requirement.
| Grit Range | What It Does | When to Use It |
|---|---|---|
| 200 to 600 (coarse) | Repairs chips, reshapes very dull edges | Damaged or badly neglected knives only |
| 800 to 2000 (medium) | The main sharpening work; raises the burr | Every sharpening session |
| 3000 to 8000 (fine) | Refines and polishes the edge | Finishing, especially kitchen knives |
| Leather strop | Removes the last traces of burr | Final passes and quick touch-ups |
Safety note: always sharpen with the stone on a non-slip base or damp towel, keep your fingertips on the flat of the blade rather than near the edge, and cut away from yourself when testing sharpness. A knife slipping on a dry, skating stone is the most common sharpening injury, and the same plain sense applies to storing the finished blade.
How to Sharpen a Knife with a Whetstone, Step by Step
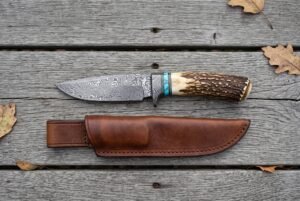
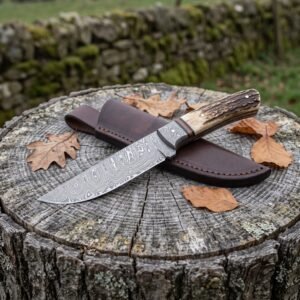 Scorpio Hand Forged Damascus Skinner Knife with Stag Antler Handle and Buffalo Horn and Walnut Spacers and Damascus Bolster | Deer Skinning Gift | RK-338
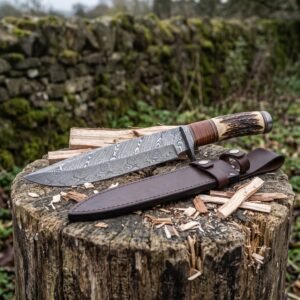 Campmaster Hand Forged Damascus Camp Knife with Stag Horn and Stacked Leather Handle and Damascus Guard and Butt Cap | Bushcraft Camping Gift | RK-562
Step 1: Prepare the Stone
Soak water stones in water for 5 to 10 minutes, until bubbles stop rising. Splash-and-go ceramic stones and oil stones just need their surface wetted with water or honing oil. Set the stone on a stable, non-slip surface at a comfortable working height. A puddle of slurry will form as you work. Leave it alone. That gray paste is doing part of the cutting, and rinsing it away is throwing out progress.
Step 2: Find and Lock Your Angle
Most kitchen knives sharpen well at 15 to 17 degrees per side; thicker outdoor and hunting knives at 20 to 22 degrees. A simple visual trick: 90 degrees is straight up, half of that is 45, half again is roughly 22, and just under that is your kitchen angle. Or stack two coins under the spine of a typical chef knife to feel what 15 degrees is like. Whatever angle you choose matters far less than keeping it identical on every stroke, which is the part nobody enjoys hearing.
Step 3: Sharpen the First Side Until You Feel a Burr
Place the heel of the edge on the far end of the stone, edge facing away from you. Draw the blade toward you and across, sweeping from heel to tip so the full edge contacts the stone, with light-to-moderate pressure on the edge-leading stroke. Repeat in smooth, consistent passes. After a few dozen strokes, gently feel the opposite side of the edge with your thumb, stroking away from the edge: a fine, rough wire, the burr, means you have fully apexed that side. Do not move on until you can feel the burr from heel to tip.
Step 4: Flip and Match the Other Side
Turn the knife over and repeat with the same angle, pressure, and roughly the same number of strokes until the burr flips to the first side. Symmetry is what centers the edge; counting strokes is the easiest way to keep both bevels even.
Step 5: Move Up to the Fine Grit
Switch to your finishing stone (3000 to 8000 grit) and repeat the process with noticeably lighter pressure, alternating sides every few strokes. The goal now is to shrink the burr and polish the scratch pattern. High-carbon and Damascus blades reward this stage most, the harder steel takes and holds a finer polish than soft stainless, which is one of the practical differences we cover in the steel glossary.
Step 6: Deburr and Strop
Finish with 5 to 10 feather-light alternating strokes on the fine stone, then strop the knife on leather or even the cardboard back of a notepad: edge trailing, spine leading, a few passes per side. This strips away the last wire of the burr, which otherwise folds over in use and makes a freshly sharpened knife go dull in a day.
Step 7: Test the Edge
Slice a sheet of printer paper held by one corner. A sharp knife cuts smoothly with no tearing. A properly finished kitchen knife will also shave curls off a tomato skin without pressure. If the edge catches in one spot, you likely missed the burr there; go back to the medium stone for that section.
Step 8: Clean Up
Rinse and dry the knife, and wipe carbon steel blades with a drop of oil before storage. Forge welded steel wants the same habit, set out in the Damascus care routine. Let water stones dry fully before putting them away, and flatten them with a lapping plate every few sessions, a dished stone makes holding a consistent angle nearly impossible.
Common Whetstone Mistakes to Avoid
Rocking the wrist. A changing angle rounds the edge instead of sharpening it. Lock your wrist and move from the shoulders.
Skipping the burr check. If you never raised a burr, you never reached the apex, and no amount of polishing will make the knife sharp.
Starting on the coarse stone every time. Coarse grits eat steel, and the steel does not grow back. A knife that is merely dull starts at 1000 grit; save 400 for chips.
Too much pressure on fine stones. Finishing strokes should use little more than the blade’s own weight.
Sharpening a dirty blade. Grit and dried-on residue contaminate the stone and scratch the bevel. Wash the knife first.
How Often Should You Sharpen?
A home kitchen knife in regular use needs the stones every 4 to 8 weeks, with a hone or strop weekly in between. Field knives should be touched up after each hunt or trip. Harder high-carbon blades, including the hand-forged Damascus in our chef knife collection and Viking knives, hold their edge longer between sessions but follow the same routine. Every blade shipped from Chicago arrives sharp, and this routine is how you keep it that way.
Whetstone Sharpening FAQ
What angle should I sharpen a knife at on a whetstone?
Use 15 to 17 degrees per side for kitchen knives and slicers, and 20 to 22 degrees per side for hunting, camp, and heavy-duty knives. Thinner angles cut better but chip easier; thicker angles trade some slicing performance for durability. Consistency matters more than the exact number. A steady 20 beats a wobbly 15 every time, and it always will.
How long should I soak a whetstone?
Soak water stones for 5 to 10 minutes, until air bubbles stop rising from the stone. Splash-and-go stones and diamond plates need only a wetted surface, and oil stones use honing oil instead of water. Never soak a stone designed for splash-and-go use, as prolonged soaking can degrade some resin-bonded stones.
What grit whetstone should a beginner buy?
A combination 1000/6000 water stone is the standard recommendation: the 1000 side handles all routine sharpening and the 6000 side refines the edge to a clean, polished finish. Add a coarse 300 to 400 stone later only if you need to repair chips, and a strop for maintenance between sharpenings.
How do I know when the knife is sharp?
Three quick tests: the knife slices printer paper cleanly without tearing, it bites into a tomato or onion skin under its own weight, and the edge no longer reflects light when you look straight down at it (dull spots show as shiny flecks). If it passes all three, stop. Further strokes at that point are just removing steel you paid for.
Can I sharpen a serrated or Damascus knife on a whetstone?
Damascus, which is 1095 and 15N20 forge welded and etched, sharpens exactly like any plain carbon knife. The layers do not change the technique, and the stone will not damage the pattern on the bevel, whatever you may have been told when you bought it. Serrated blades are different: their scallops need a tapered ceramic rod worked in each individual serration, not a flat stone.
Why does my knife get dull again so quickly after sharpening?
Almost always a leftover burr. A wire edge feels sharp at first, then folds over with the first real cutting session. Finish every sharpening with light alternating strokes and a strop, and store knives so their edges never bang against other tools in a drawer. A drawer of loose blades undoes a sharpening session faster than any amount of cutting.
A curved blade will not sit flat on a stone, and the workaround is in sharpening a curved blade. The rest of the routine, including storage and oiling, is in our full knife care guide, and kitchen blades are treated separately in the hand forged kitchen knife guide.
Pieces in the catalogue
Ready to ship, the Forgeskin skinner knife and the Shadowreed Tanto. The Brassward Viking Seax knife and the Bluecleaver cleaver are the other two.
Shop the range
Scorpio Hand Forged Damascus Skinner Knife with Stag Antler Handle and Buffalo Horn and Walnut Spacers and Damascus Bolster | Deer Skinning Gift | RK-338Campmaster Hand Forged Damascus Camp Knife with Stag Horn and Stacked Leather Handle and Damascus Guard and Butt Cap | Bushcraft Camping Gift | RK-562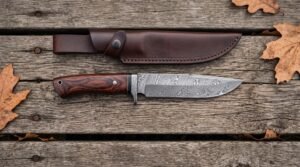 Rosecamp Hand Forged Damascus Camp Knife with Rosewood Handle and Damascus Guard and Black Spacer & Leather Sheath | Camping Outdoor Gift | RK-1053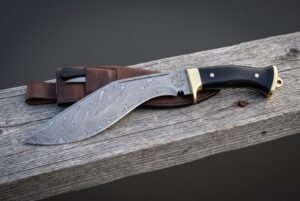
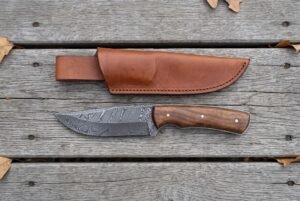 Bobcat Hand Forged Damascus Skinner Knife with Walnut Wood Handle & Leather Sheath | Full Tang Hunting and Skinning Gift | RK-331