
Blog
The Complete Knife Care Guide: Blade, Handle and Sheath

Knife care comes down to a few habits, none of them interesting. Keep the blade dry and lightly oiled. Keep the wooden handle fed with a thin coat of oil. Keep the leather sheath clean, conditioned sparingly and dry, and store the knife out of it. Every blade we sell is carbon steel, either plain 1095 or Damascus made of 1095 and 15N20, and neither is stainless, so moisture, salt and acidic residue will rust the steel and mute the etched pattern if they are left to sit. The good news is that the whole routine takes under a minute after each use, and even a neglected, rust spotted blade can almost always be brought back. None of it is urgent, which is exactly why people skip it. This guide covers the blade, the handle, the sheath, storage, first rust and a short care schedule.
Why Carbon Steel Blades Need Care
The same chemistry that makes a hand-forged blade cut and etch makes it reactive. Plain 1095 has essentially no chromium. In a Damascus blade the dark layers are 1095 and the bright layers are 15N20, which resists acid a little better thanks to its nickel content but is still a carbon steel. None of this is a defect. A carbon steel blade that shows honest patina and asks for a wipe of oil is behaving exactly as designed. The trade off is an edge that sharpens easily and cuts well. If you would rather skip maintenance entirely, that is a steel choice question, covered under stainless in our knife steel glossary.
Blade Care: The 60 Second Routine After Every Use
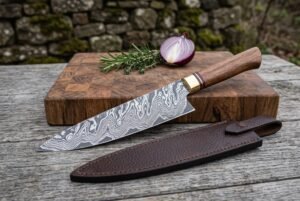 Brasshearth Hand Forged Damascus Chef Knife with Hardwood Handle and Brass Bolster and Fiber Spacers & Leather Sheath | Chef and Housewarming Gift | RK-396
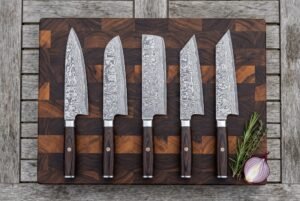 Wengechef Hand Forged Damascus Chef Knife Set of 5 with Wenge Wood Handles and Steel Bolsters and Mosaic Pins & Leather Sheaths | Chef Kitchen and Housewarming Gift | RK-1137
 Emberstack Hand Forged Damascus Bowie Knife with Stacked Leather Washer Handle | Straight Back Fullered Blade | Engraved Steel Pommel Cap | Leather Sheath | Hunting Gift | RK-2178
Step 1: Wash by hand, never the dishwasher
Rinse the blade with warm water and mild dish soap, using a soft sponge. A dishwasher combines prolonged moisture, harsh detergent and heat. No hand-forged knife survives that treatment, and the fault there lies with the machine rather than the blade. This applies equally to Damascus chef knives in the kitchen and field blades rinsed at camp.
Step 2: Dry immediately and completely
Towel the blade dry the moment it is rinsed, paying attention to the spine, the plunge line and the joint where blade meets guard or handle, the spots where water hides. Air drying is how most rust spots start.
Step 3: Apply a thin coat of oil
Wipe a few drops of oil over the entire blade with a cloth or paper towel, then buff off the excess. A film you can barely see is enough. The goal is a barrier between steel and air, not a dripping blade.
Which oil for the blade?
| Oil or Product | Best For | Notes |
|---|---|---|
| Food grade mineral oil | Kitchen and chef knives | Safe on food surfaces; cheap; never goes rancid |
| Camellia oil | Kitchen and collector blades | Traditional Japanese blade oil; light and food safe |
| Gun or knife oil | Hunting and outdoor knives | Excellent protection; not for food prep blades |
| Paste wax or microcrystalline wax | Display pieces, axes, swords | Long lasting sealed barrier for blades not in regular use |
| Vegetable or olive oil | Emergency only | Can go rancid and gummy; replace with mineral oil soon |
Damascus only: restoring a faded pattern
Years of use and polishing will slowly soften the pattern’s contrast. Because the layers run through the blade, the pattern can be revived. Clean and degrease the blade thoroughly, then re-etch it with ferric chloride solution (sold for circuit board etching) diluted per the product instructions, or with repeated applications of hot white vinegar. Immerse or wipe evenly, rinse with water, neutralize with a baking soda rinse, dry and oil. The dark layers deepen and the nickel layers brighten again.
First Rust: How to Remove It Without Losing the Pattern
Caught early, rust on carbon steel is a five minute fix. For light orange speckles, rub the spot with oil and a soft cloth, or oil plus fine (0000) steel wool used gently. The oil lubricates and keeps the abrasion mild. For slightly deeper spots, a paste of baking soda and water on a soft cloth works without harsh scratching. Work along the pattern, rinse, dry and re-oil. What you must avoid is aggressive sanding, wire wheels or coarse abrasive pads. They cut through the etched surface, and while the layers are still in the steel, the crisp dark and bright contrast will be flattened until the blade is re-etched. Deep, pitted rust is beyond cosmetic rescue. Stabilize it by removing the active red rust and oiling, and accept the scar as history.
Gray to dark blue discoloration that forms evenly with use is patina, not rust. It is a stable oxide layer that gives the steel a little protection and it should be left alone. Orange or red spots are rust and get the treatment above the day you notice them.
Wooden Handle Care
Wood is a bundle of fibers that constantly exchanges moisture with the air. Left untreated, it dries and shrinks in winter heat, swells in summer humidity, and eventually checks, those fine cracks that appear along the grain. On a knife that movement has consequences: gaps open at the tang, scales loosen around their pins, and water creeps into the joint where you cannot dry it. Oil fills the fibers so water cannot, keeping the wood stable and the grain rich and dark. This applies equally to a chef knife used daily, a hunting knife that sees blood and weather, and a folding pocket knife living in a sweaty pocket.
Choosing the right oil for wood
| Oil or Finish | Food Safe? | Dries or Hardens? | Best For |
|---|---|---|---|
| Food grade mineral oil | Yes | No, re-apply monthly | Kitchen knives; the easy default |
| Beeswax and mineral oil blend (board butter) | Yes | Semi, wax layer adds water resistance | Kitchen and field knives |
| Pure tung oil | Yes, once cured | Yes, cures to a hard finish | Durable finish on frequently wet handles |
| Boiled linseed oil | Not for food contact | Yes | Axe hafts, display pieces, non-kitchen tools |
| Danish or teak oil blends | Usually not | Yes | Non-food handles wanting a satin finish |
| Olive or vegetable oil | Yes, but goes rancid | No | Nothing. Avoid on handles |
If you only buy one product, make it food grade mineral oil: cheap, safe on every knife in the house, and impossible to get wrong. Stabilized wood handles (resin impregnated) need almost no oiling at all. A wipe and occasional wax is plenty.
How to oil a wooden handle
Clean it gently. Wash with warm water, a drop of mild dish soap and a soft cloth. A quick wash, never a soak. Get into the junction where wood meets steel or bolster, where grime collects. Keep your fingers off the edge path.
Dry it completely. Towel dry, then let the knife stand for an hour or two so the surface moisture in the wood evaporates. Oiling over damp wood seals water in, the opposite of the goal.
Smooth raised grain only when needed. If the handle feels fuzzy or rough, common after the wood has gotten wet repeatedly, give it a light pass with 400 to 600 grit sandpaper, always with the grain, then wipe off the dust. Most oilings skip this step.
Apply a thin coat. Put a few drops on a soft cloth or directly on the wood and rub it in with your fingers, working along the grain and into every seam, pin and the tang junction. Thin is right: the wood should look richer, not wet.
Let it soak, then buff. Give mineral oil 15 to 30 minutes. A very dry handle may drink several rounds, so keep feeding it until it stops absorbing. A handle that has been ignored for years will take far more than you expect. Curing oils like tung need overnight between coats. Then buff off everything the wood did not absorb with a clean cloth. An oily film left on the surface attracts dust and makes the grip slick.
Optional wax topcoat. For knives that see water constantly, follow the oil with a thin layer of beeswax blend, let it haze, and buff to a soft sheen. The wax is a sacrificial water barrier that renews in seconds.
Reviving a neglected handle
A gray, dried out handle can usually be brought back. Clean it, let it dry fully, sand lightly from 320 up to 600 grit to remove the weathered surface, then feed it thin coats of oil over several days until the color deepens and evens out. Finish with wax. If the scales have genuinely loosened or a crack goes through to the tang, a knifemaker can re-pin and re-scale the handle, which is worth doing on a quality forged blade. The mistakes that get handles to this state are the dishwasher, soaking in the sink, cooking oils that turn rancid in the grain, and ignoring the first pale, chalky signs of thirst.
Leather Sheath Care
A leather sheath is the environment your knife lives in. Leather is skin: it breathes, absorbs water and holds it. Tanning chemicals and absorbed moisture make a neglected sheath mildly corrosive to carbon steel, which is why a knife left for months in a damp sheath comes out speckled with rust. Caring for the leather protects the fit, the retention, the stitching and the blade of every fixed blade you own, from a skinner to a full size Bowie.
Clean, condition and protect a sheath
Empty it and inspect it. Remove the knife and shake out grit, sand and debris. Trapped grit inside a sheath acts like sandpaper on your edge every time you draw. Check the stitching for loose threads, the welt for cuts from careless sheathing, and the belt loop for cracking.
Clean the surface. Wipe the outside with a soft cloth that is barely damp, wet enough to lift dirt, never soaking. For ground in grime and dried blood, work a small amount of saddle soap into a lather with a damp sponge, clean in gentle circles, and wipe the residue away. For the inside, a rolled cloth pushed through does the job. Never pour anything liquid into a sheath.
Dry it slowly, always. If the sheath got rained on, dunked or sweated through, stuff it loosely with paper towel and let it air dry at room temperature over a day or two, changing the paper as it dampens. Never speed things up on a radiator, near a campfire, in an oven or with a hair dryer. Fast heat is the number one killer of sheaths. It shrinks and hardens leather permanently, and a heat shrunk sheath grips the blade so tightly it scratches, or cracks outright.
Condition sparingly. When the leather looks dull or feels dry and stiff, typically two to four times a year for a sheath in regular use, apply a thin coat of a proven leather conditioner: neatsfoot oil, a beeswax based leather balm, or a purpose made conditioner. Rub it in with fingers or a soft cloth, let it absorb for a few hours, then buff off the excess. The critical word is thin. Over oiled leather turns soft and floppy, loses the molded fit that retains your knife, and can weep oil onto the handle. Skip household products. Petroleum jelly, olive oil and furniture polish go rancid, darken leather unevenly or attack the stitching. The kitchen cupboard is not a leather care aisle.
Protect against weather. For sheaths that live outdoors in wet season, finish with a light coat of beeswax or a wax based leather protector, warmed slightly with your hands and buffed to a low sheen. Wax adds real water resistance without soaking into the fibers the way oil does. Re-apply after hard, wet trips.
Never sheath a dirty, wet blade. Blood and water wick straight into the welt. Wipe the blade clean and dry every single time before it goes home.
When a sheath is beyond saving
Cracked through leather, rotted stitching along the welt, or a cut welt that lets the edge reach the threads mean retirement. A compromised sheath is a safety problem, because a blade can push through where you grip it. Many of our knives, including the Viking seax and Damascus skinner knives, ship from Chicago, Illinois with fitted leather sheaths, so a replacement knife and sheath pairing is straightforward if yours has served its time.
Storage: Where Blades Rust Silently
More carbon steel blades are ruined in storage than in use. Three rules prevent nearly all of it. First, never store a blade long term inside a leather sheath. Leather absorbs moisture and its tanning chemicals can be corrosive, so a blade left sheathed through a humid season often comes out spotted. Keep the knife wiped down and lightly oiled in a dry drawer, and the sheath standing open in ventilated indoor air, side by side. For day to day carry, keeping the knife sheathed is fine; the problem is weeks and months. Second, store blades in a dry, ventilated place. A drawer or blade roll indoors beats a garage or truck toolbox. Third, for long term storage, oil or wax the blade generously and check it every month or two. A desiccant pack in a display case or drawer is a cheap upgrade that pays for itself. These rules apply doubly to big carbon steel pieces like Viking axes and swords, which tend to sit on display for months between handlings.
The same rule applies to a wall piece, so keep a display sword out of its scabbard between showings.
Care in the Field
Hunting season is where care habits earn their keep. Blood, fat and moisture are mildly corrosive, and a blade often rides in a wet sheath all day. Wipe your hunting knife or skinner clean as soon as the work is done, dry it at camp, and oil it before it goes back on your belt. A small cloth and a one ounce bottle of oil weigh nothing in a pack. Oil the wooden handle after every hard trip as well, and let a soaked sheath dry properly before the knife goes back in it.
A weekend at an event is harder on steel than a month indoors, which is why a reenactment sword earns a wipe and an oil before it goes back in the car.
A Short Care Schedule
| Task | How Often | What to Use |
|---|---|---|
| Wash, dry and oil the blade | After every use | Mild soap, towel, thin coat of oil |
| Shake grit out of the sheath, quick wipe | After every outing | Dry soft cloth |
| Oil the wooden handle | Monthly in regular use; after every hard trip; before storage | Food grade mineral oil or beeswax blend |
| Full sheath clean | Monthly in heavy use, or when visibly dirty | Damp cloth or saddle soap |
| Condition the sheath | 2 to 4 times a year | Neatsfoot oil or leather balm, thin coat |
| Wax the sheath for weather | Before wet season carry | Beeswax based protector |
| Check stored blades for rust | Every month or two | Eyes, oil, 0000 steel wool if needed |
| Re-etch a faded Damascus pattern | Only when contrast has gone flat, often years | Dilute ferric chloride or hot vinegar |
| Separate knife from sheath | Any storage over a few weeks | Dry, ventilated storage |
Display pieces can stretch the handle oiling to two or three times a year, more in dry, heated houses. For every knife: wash by hand, dry immediately, and never leave a wooden handled knife in a sink or a dishwasher. Ten minutes of heat and detergent does more damage than a year of use. That is the whole maintenance routine for the hand-forged blades in our Viking knife collection and everything else we sell.
Some jobs need more room than a general guide allows. Sharpening on a stone is covered in using a whetstone, curved edges in working a curved edge, and kitchen blades in keeping a hand forged kitchen knife right.
Single edged blades with riveted scales and a nagel want the same attention at the rivets and along the scale seam, and the messer guide covers how that family is put together.
Knife Care Questions
How often should I oil a carbon steel or Damascus knife?
Oil the blade after every use and wash, and monthly during storage in humid climates. A knife that lives in a dry indoor drawer can stretch to every two or three months, but a quick wipe of oil is so fast that most owners make it part of putting the knife away.
Can I use olive oil on my knife?
In a pinch, yes. As a long term choice, no, for the blade, the handle or the sheath. Vegetable oils oxidize, turn gummy and go rancid, and a rancid handle is a harder problem than the one you were solving. Food grade mineral oil or camellia oil gives the same food safe protection without those drawbacks and costs very little.
How do I get rust off a Damascus blade?
Rub light rust away with oil and a soft cloth or 0000 steel wool, or use a baking soda paste for stubborn spots, then rinse, dry and re-oil. Avoid coarse abrasives and power tools. They flatten the etched contrast and the blade will need re-etching to look right.
Will the Damascus pattern wear off with use and sharpening?
The pattern can fade at the surface with heavy polishing, and sharpening exposes bright steel along the edge bevel, but it can never truly wear off. The layers run through the entire blade. A quick re-etch in ferric chloride or hot vinegar restores full contrast at any time.
Should I store my knife in its leather sheath?
For daily carry and short trips, yes, that is what the sheath is for. For storage longer than a few weeks, no. A sheath is transport, not accommodation. Leather holds moisture and residual tanning chemicals against the steel, which is why sheath stored carbon steel blades so often develop spotting. Store the knife oiled and uncovered or in a blade roll, with the sheath kept alongside.
What is the best oil for a wooden knife handle?
Food grade mineral oil. It is food safe, never goes rancid and is nearly impossible to over apply. Beeswax and mineral oil blends add water resistance, and pure tung oil suits handles that need a harder cured finish. Reserve boiled linseed oil for non-food tools like axe hafts, and never use cooking oils.
My sheath or handle got soaked. What do I do?
Take the knife out at once, blot everything, and let both dry slowly at room temperature for a day or two, the sheath stuffed loosely with paper towel, the knife standing in airy shade. Never use direct heat. Once fully dry, condition the leather and re-oil the wood, because water strips the oils from both.
Do stabilized wood handles need oiling?
Barely, and this is the one piece of maintenance here you are allowed to forget. Stabilized wood has been vacuum impregnated with resin, so it cannot absorb much oil or moisture. A wipe down and an occasional coat of paste wax for shine is all it needs.
The shop side of this
Ready to ship, the Quillhide leather knife sheath and the Knotwelt Viking knife sheath. The Ramcrest skinner knife and the Hornfold folding pocket knife are the other two.
Shop the range
Brasshearth Hand Forged Damascus Chef Knife with Hardwood Handle and Brass Bolster and Fiber Spacers & Leather Sheath | Chef and Housewarming Gift | RK-396Wengechef Hand Forged Damascus Chef Knife Set of 5 with Wenge Wood Handles and Steel Bolsters and Mosaic Pins & Leather Sheaths | Chef Kitchen and Housewarming Gift | RK-1137Emberstack Hand Forged Damascus Bowie Knife with Stacked Leather Washer Handle | Straight Back Fullered Blade | Engraved Steel Pommel Cap | Leather Sheath | Hunting Gift | RK-2178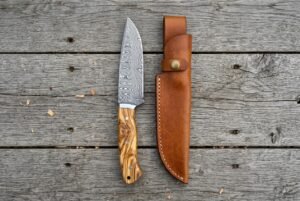 Olivecamp Hand Forged Damascus Hunting Knife with Olive Wood Handle and Steel Bolster & Handmade Leather Sheath | Bushcraft Camping and Outdoor Gift | RK-10469
 Stagsteel Hand Forged Stainless Steel Folding Pocket Knife with Stag Horn Handle & Two Leather Sheaths and Engraving Available | Everyday Carry Gift | RK-1032
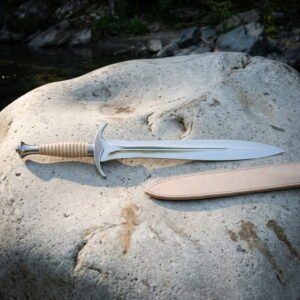 Leafborn Hand Forged 1095 Steel Leaf Blade Short Sword | Downswept Engraved Crossguard | Ribbed Bone Toned Grip and Veg Tan Leather Sheath | Fantasy Collector Gift | RK-1800